Showing posts with label steps. Show all posts

Wednesday, 16 March 2016

Deck Building. Landscaping Around the Deck

So the deck is done at last, at least in terms of construction, now it just needs to "fit" in the back yard. Right back when I started laying the yard out I always had a vision of some kind of stairway to take me up from the paved area and onto the deck. However the other staircase I built already suited that purpose, and I really didn't want two sets of identical stairs off the same deck.

I needed some inspiration to go between the white lines!


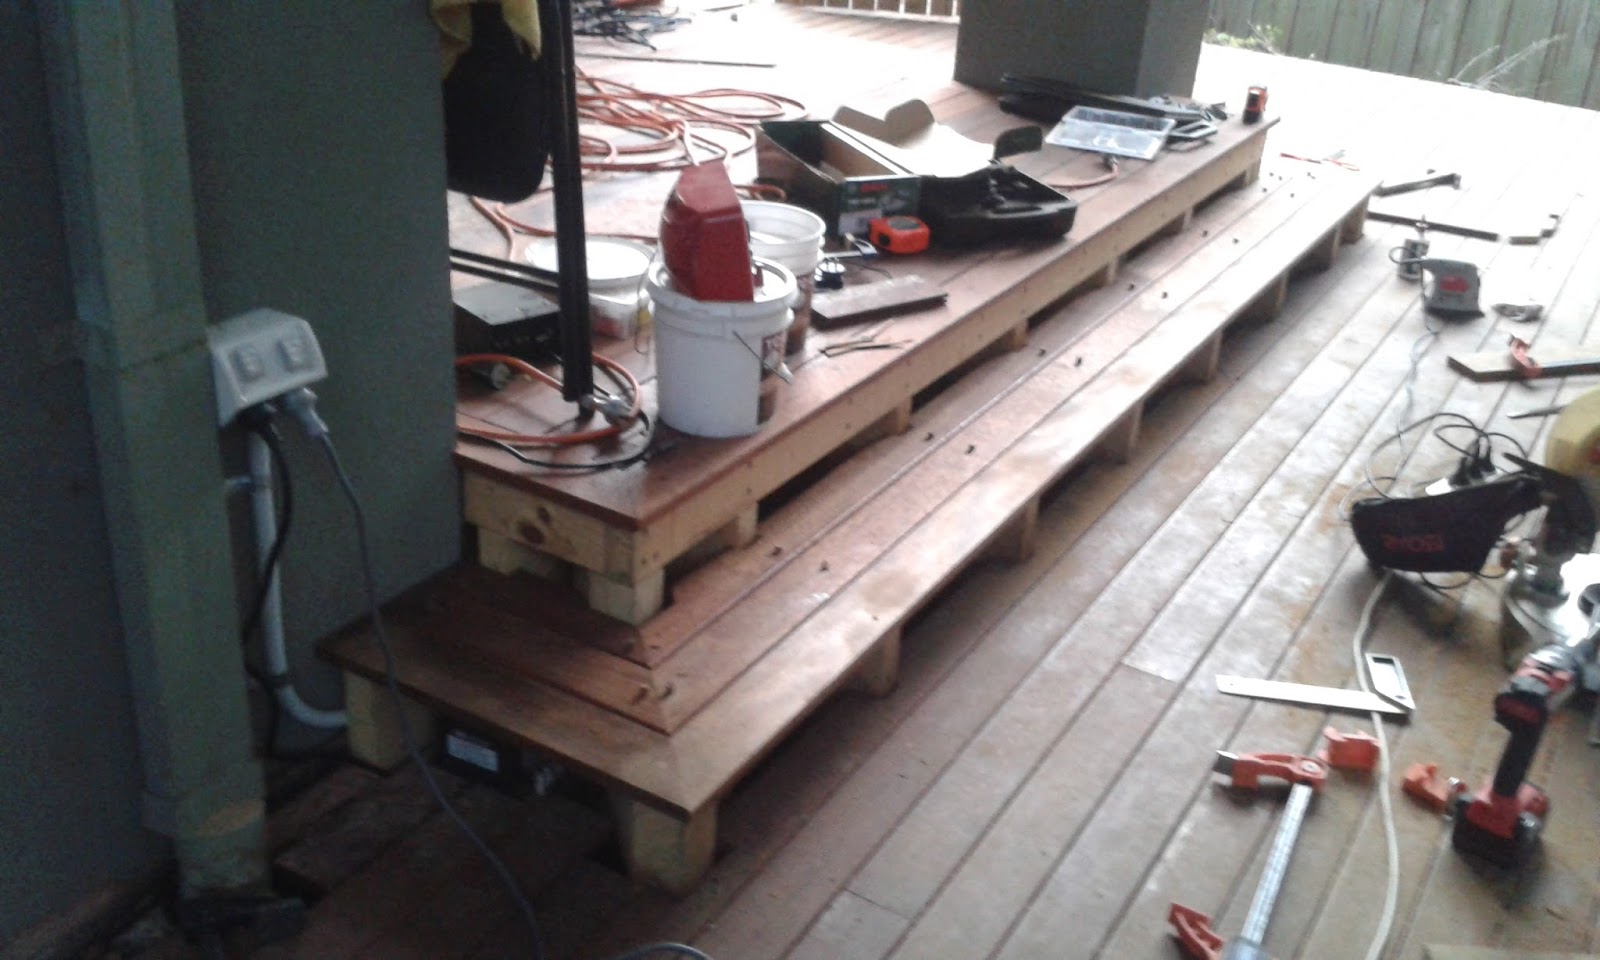
Basic steps. What to do?

On a visit to Japan we went to Ōkōchi Sansō (大河内山荘 Ōkōchi Sansō, literally "Okochi Mountain Villa") which is the former home and garden of the Japanese period film actor Denjirō Ōkōchi, and is located on the edge of the famous bamboo forests of Arashiyama in Kyoto. This gorgeous garden is open to the public (for a fee) and served as inspiration for what I decided to do with the alternate path.

Below shows a great example of a path that leads up through the garden. The stepping stones are made from large pieces of local stone, and assembled in such a way that they look part of the natural landscape, but still indicate the path to follow.

A natural rock path disappearing around the corner

Periodically along the path you come across these gravelled areas as you can see below, set to resemble flowing water coming down the hillside.

A beautifully landscaped gravel path

From these gravelled areas the path then leads further along, using the natural stone as steps meandering up the side of the hill and throughout the garden.

The mysterious path continues upwards, one way

So using these photos for inspiration I called my favourite landscaper Stefan from Stefan's Landscape Design to have a look at what he could achieve. As always he looked at the photographs and understood exactly what I was after, and set about doing it.

The brief was to build a natural looking rocky outcrop with a stone path snaking up through it, containing a number of gravel landings linking the path to each switchback up the slope.

Two days later with a pile of rocks and a bobcat he achieved exactly what I was after! You can see below the landscaping prior to me enclosing the deck around it.

Now that the landscaping is complete I can enclose the last part of the decking

Once enclosed, the decking was now complete. From the circular paved area at the bottom the path goes up three stone steps to the right to a gravel landing, then switches back four steps to the left to the next landing, and then finally takes three more steps up to the right to meet just below the bottom of the decking, leaving one step up to the deck proper. He'd nailed it completely!

The landscaping and decking completed

He'd also included an extra gravel landing at the top as a lookout across the yard as you can see below with the gravel area to the right shown below.

The steps blend in faultlessly with the decking

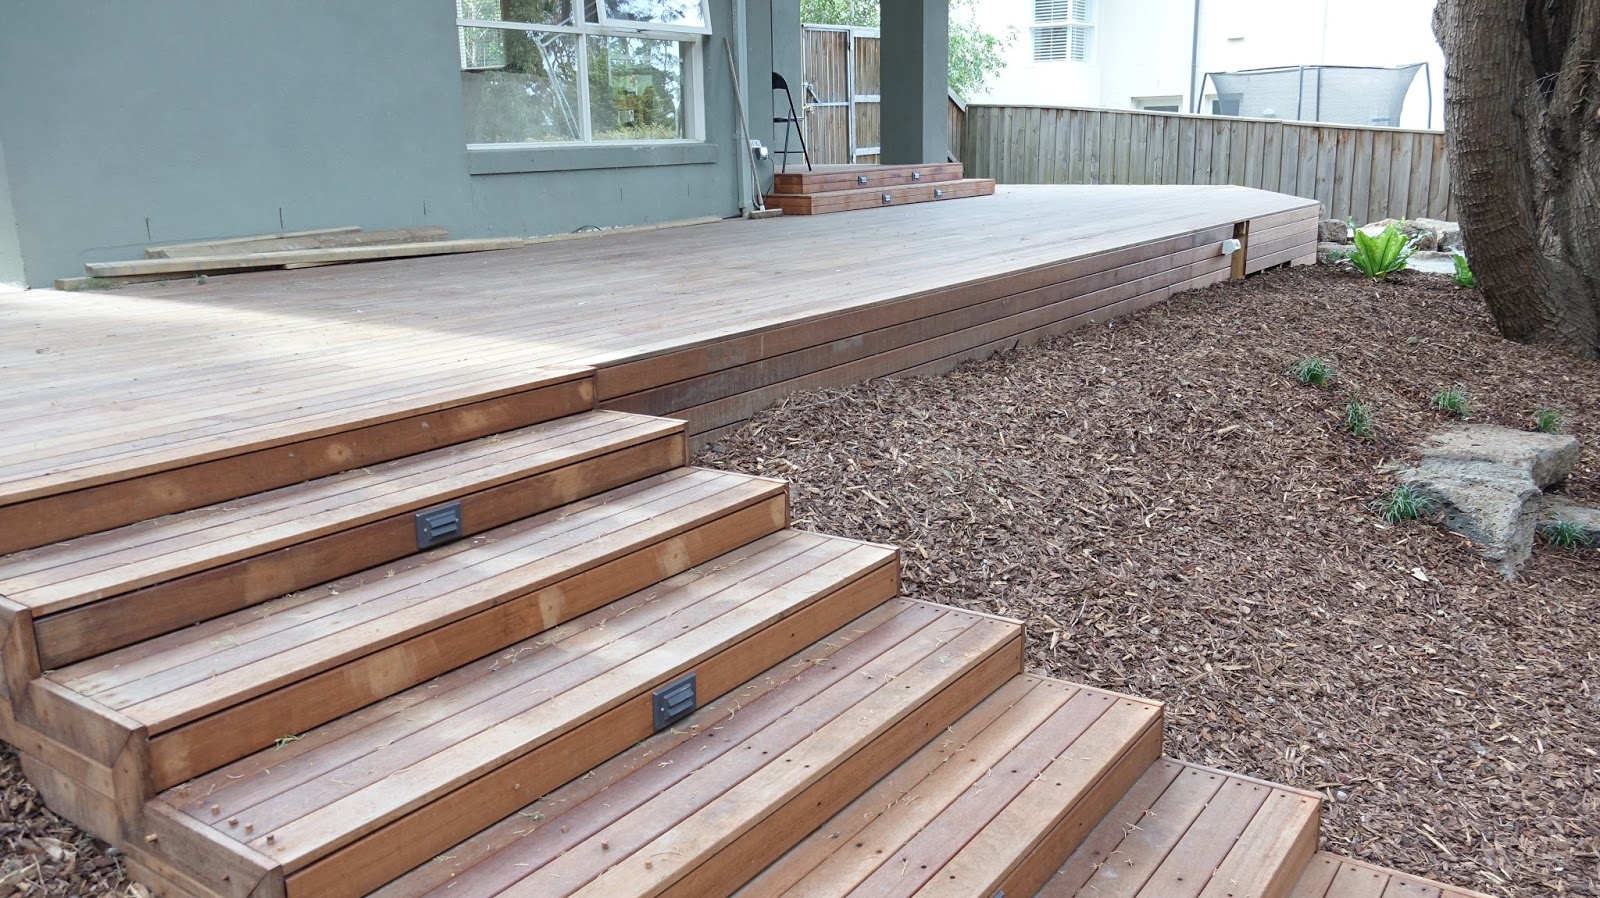
Below shows the completed deck and garden area nicely planted with some ferns, mondo and dwarf pine shrubs.

The decking now landscaped in with the rest of the yard

The alternate path is now complete with easy access from the circular paved area up to the deck proper, but not in a obvious staircase manner. Call it a secret short cut if you like, because for all intents and purposes it just looks like a rock garden, but once you recognise the path, it draws you upward (or downward) to explore the trail.

The circular paved area is now linked to the decking via the rockery path

Unfortunately one thing fell victim to the construction, that being the back lawn. The bobcat moving back and forth carrying the heavy rocks and soil destroyed what was left of it. Truth be told it was pretty much dead anyway. Ever since laying in the turf, regardless of it being a shade tolerant species, the large pine tree slowly and surely started a war on the grass by dropping pine detritus upon it every time the wind blew.

I guess if I went out every weekend with a blower I may have kept it alive a little longer, but by the time I realised what was going on, the lawn was dead with the exception of one small area that was free from the tree. The bobcat finished the job and killed the remainder. RIP lawn.

RIP back lawn. You were great while you lasted.

What to do? Should I plant another? It wasn't a prospect I looked forward to. A little investigation and I settled on the artificial option, which would never die, well at least not for 25 years or so.

I went to a few suppliers and finally settled on a company called Synturf that manufactures the product locally. It does cost about 3 times more than instant turf, but they do everything for you. They start by coming in and digging out the old turf; then constructing and compacting a base to put the turf on, and finally lay and settle the turf on top pinning it down into the base and loading it up with sand to hold it firm.

The product is called Everest, and has a brown fleck throughout the grass that gives it a very natural look. Admittedly when some of the detritus from the tree falls onto the grass it looks more natural than ever! Everyone who sees it can't believe it's artificial grass, and it looks a million bucks as you can see.

The new lush green lawn is believe it or not, made of plastic!

So lets now take a trip back in time and as you can see below, this is the very first photo I took of the yard not long after we moved in. How different it looks now compared to back then. I remember we had to plant my son's Totem Tennis he got for Christmas that year in amongst the weeds.

Mowing the yard then was a case of getting out and hacking away with a brush-cutter. Things have changed!

We've come a long way since the beginning and the very first photo

Now you can compare it directly to below which shows the (pretty much) completed back yard. What a difference!

The completed yard sure looks different to how it started!

The new Synturf looks sensational, and the yard is now pretty much completed.

The new artificial turf has come up trumps

Below the deck is now ready for summer with many BBQ's to come.

All set and ready for summer BBQ's

Next time we'll apply a finish to the deck to complete the project.

Tuesday, 16 February 2016

Deck Building. Finishing the Flight of Stairs

One of the most popular posts I ever put up was building the frame for the flight of stairs that runs from the decking down to the lawn area. Well now that the top decking has been completed, it's time to deck the stairs. We're getting close and the end is in now sight. The last piece of this grand puzzle to be completed is literally a puzzle!

As I've gone to so much effort to deck everything, I wasn't prepared to leave any of that treated pine from the stair stringers showing. Adding to the complexity however is the whole "nail free" concept. The Deck Master system wasn't going to be much use on the steps as the treads are only three boards across, and to top it off I had run out of the Deck Master slotted timber! 


So the plan I came up with was to use the wood plugs which I thought (at the time!) would be less fiddly. Rather than use the Deck-Max plugs though as I was going to need hundreds of these things, I decided to make my own to save some money! 

I sniffed around online and came up with a vendor in Sydney called "The Wood Works" that sells a plug cutter and counterbore set. This consists of two drill bits in the set; one for cutting the 10mm wood plugs, and the other to counterbore the 10mm holes that the wood plugs fit into. Sounds simple.

Image courtesy "The Wood Works"

To use the plug cutter you need a drill press (or a plunge router) to hold the cutting bit perfectly vertical so that the plug comes out straight. Be prepared for this as it's a bit of a chore! 

It's a 4 step process:

  1. Turn on the drill and place the timber
  2. Slowly drop the drill press to cut the plug and then raise it once the cut is finished
  3. Turn off the drill press
  4. Using a small screwdriver, knock out the plug from the centre of the drill bit
Go back to step 1, and repeat 850 times! I had plenty of scrap off-cuts to work with from which the plugs are cut. 

Eventually you'll end up with a bag full of wooden plugs, but it doesn't stop there. To make the 10mm plugs easier to fit into the 10mm holes, you have the chamfer them on one end with a sander. For this I taped up my fingers (or else the sander will eventually go through your fingernail as I found out) and loaded the sander in a vice. Phew, this is a lot of effort for a finish! Maybe it would have been easier to buy these, but where's the satisfaction in that?

Eventually I was ready to go. The plan was to start with the top edge of the outside stringers, then infill the treads and risers, and finally veneer the outside stringers to match and knit in with the horizontal boards on the front side of the deck. Just like a giant 3D jigsaw puzzle!

Below shows the beginning of setting the boards onto the top edge of the left hand stringer. They have to be lined up such that the boards on the risers and treads sit will sit flush when fitted, but also line up with the horizontal facing boards on the deck!

Bring on the mitre joins. Starting out with the first boards.

I'd first cut the board to fit, make sure everything lines up and is level, then glue the underside with "liquid nails" and clamp it in place. Next, using the 10mm counterbore tool I would drill the hole, then fix a decking screw into the hole, lastly when the piece is glued and screwed, I'd glue and bang in my pre-cut wood plugs. When it's all dried you then cut off the excess with a vibrating multi-tool and give it a sand to finish. No nails showing!

Below shows the progress down the left hand side which is about 3/4 complete.

Fair progress down the left hand side

Cut, fit, glue, clamp, drill, screw and plug, over and over. Eventually as shown below I reached the bottom of the left hand side. Like a jigsaw I found it very therapeutic and relaxing work!

Left had side completed

Once the left was completed, I moved across to the right hand side and finished it to match.

Right hand side completed

Now both sides were done I could start putting down the treads, and then finally and hopefully, walk down the stairs for the first time!

Looking at both sides

Once I had the outside edges of the two side stringers completed, I started on the top stair tread sizing up the boards and riser as you can see below. Measure twice, cut once!

Sizing up the boards for the first step

Below shows the first step and riser completed and fixed in place and I can finally stand on the top step! Note the notch I had to cut into the rise on the centre stringer.

First step boards fixed down

The notch on the nose of the centre stringer is to accommodate the step lighting. I'm using the same lights to match the landing steps, with four of them to fit, one on every 2nd step.

Cutting the centre stringer to allow for the step light

Fitting the lights was easier than on the landing, as here I only had to deal with a single board whereas on the landing I had to fit the light in between two boards. 

Essentially I just found the centre of the board, marked out the square where the light will fit, then cut it out with a drill and jigsaw.

Sizing up the boards with the step light fitted

So three steps down with the first light fitted and it's looking pretty good. The extra effort in making sure the stringers were spot on when I was building the frame has paid off as everything is dead level.

Top 3 steps done

Below shows fitting the riser board in to make sure the gaps are uniform. I had some thin timber offcuts that I used to wedge around the board, and then used a large flat blade screwdriver to level it all in place nice and square. Finally I then drill the holes for the screws and plugs.

Wedging up the riser board to make sure it's centred

So here is the completed stair with all the treads and riser boards in place. I left all the wiring tied and hanging just behind the holes so I can now fit the rest of the stair lights in.

Putting in the risers to finish up the bottom steps

Job done as you can see below, with all the lights fitted in. Now there's just a matter of plugging a few hundred holes!

Steps completed

With the steps and deck front now completed, I can start the jigsaw puzzle down the side of the steps. Starting at the top left of the stair I carefully measure and cut the timbers to fit around the top edge boards to give it a 'continuous' look. 

Then like any other piece it gets glued, clamped, screwed and plugged. Each piece of timber is a unique cut to suit that step, so there's no mass production here!

Commencing the jigsaw puzzle

Below is a closer look to how I cut, clamp and space each piece of timber to fit. Using the left over Deck-Max biscuits from building the side deck gives me a perfect 3mm gap. I then use the clamps to hold in place while I glued and screw. Once it's set I just prize out the biscuits with a pair of multi-grips, ready to use again on the next piece.


Next step

So here you can see I have finished the timber puzzle on the left side of the stairs all the way to the bottom. 

Left hand side done

It's a bit of effort to go through to cut and round off each piece of unique timber, but I think it looks so much nicer than bare treated pine. Below is the right hand side plugged and polished.

The right hand side puzzle completed

Below shows the deck step lights on and working. They really give it a nice professional finish, and they're also very practical on a dark night!

Light it up!

So here is the deck showing both sets of stairs completed (well almost completed, there's still the matter of plugging a couple of hundred holes).

Stairs completed

So that's it, job done, steps completed. I can tell you I've walked up and down them many times now, and they work as designed. There's not an ounce of bounce! Rock solid baby.

Worth the effort

So now the deck construction is completed! Time for a well earned beer. 

Next post we'll look at landscaping around the deck to incorporate it into the rest of the yard, as well as cleaning and applying a finish.

Thursday, 14 January 2016

Finishing up the Landing Steps

Happy New Year 2016 everyone!

I've been having a bit of a break enjoying the Australian Christmas summer time out on the back deck (asleep on the lounge some of the time too). 


Last post we laid the decking around the curved stonework, so now let's get back into it and look at finishing up of the landing steps by putting the boards down!

I decided to start simple and tackle the side steps first. Below you can see I start by fixing the nose board first, using the riser boards clamped underneath to make sure it all lines up. I then fixed the nose board down using the DeckMax counter-bore tool with screws and wood plugs.

The boards for the risers were a little trickier as I had to:

  1. rip them down to size, allowing for a 3 mm gap above and below each board. You can see below I used slivers of offcuts to space the boards to 3 mm; and then
  2. cut a hole in the middle for step lighting I wanted to fit (see the next picture below)

Fitting the nose board

The step light shown below is what I want to fit into the riser boards for all the steps. It took me a while to find exactly what I was looking for, and eventually had to import them from Hinkley Lighting in the USA via Amazon, as I couldn't find anything locally that was similar. They have a really comprehensive array of deck lighting available. 

They were pretty easy to fit, I just measured up the back of them and marked up the boards with the outline, then cut each board using the jigsaw.

Hinkley Lighting 1546BZ horizontal deck light (image courtesy of Amazon)

For the tread boards I had to cut in notches to the final board to fit around the stringers. I just measured them up, transposed them onto the board with a pencil, and then made the required cuts into the board with a jigsaw. Below you can see the bottom step completed with the light fitted in.

Bottom step completed with step light fitted

It's then just a case of replicating the process for the next set of boards for the facing riser and fitting it all together. Below is the completed side step with the lights in and turned on!

Side steps completed with operational stair lights

Having satisfied myself that it worked, I then moved on to the front step using the same methodology. In this instance though just to complicate things a little, there were mitre joins needed on each corner. 

I pre-cut all the boards before hand and clamped everything in place first just to make sure it was all going to fit. You'll notice I still use the Deck-Max "original" biscuits as spacers on the tread boards, as they are really great for getting the gap to exactly 3 mm, and I still have 1/2 a box left over from doing the side deck!

With the mitre joins I measured and cut the boards slightly over sized, and then using the circular saw proceeded to cut the smallest 1 mm or so "nibble" of the end, and tried it for size. If it didn't fit I'd take another mm off, and try again, and then again, until it was an exact fit. 

It's real easy to cut the wood shorter slowly, but it's damned hard to try and add it back on if you cut it too short, so take your time! 

You can see below I have already fixed the nose board, and have clamped up the next ones for size and spacing.


Checking the boards for size and spacing

Below shows the tread boards fitted and fixed. Like with the side step, I had to cut notches into the last board to fit around the stair stringers.

Step tread boards completed

As you can see below, it's worth taking the time on those mitre joins to get them spot on. The joins are all under cover, so I didn't have to worry too much about leaving a gap on the mitre. If this join was exposed to the weather you'd want to leave a mm or two gap on the mitre join to allow for any swelling of the wood that could occur.

Nice and precise joins make it a professional looking job

Below shows the finished step tread boards from the opposite angle. Once the glue on the wood plugs has dried you just cut them off with a vibrating multi-tool and sand them smooth.

Once small step for me, and giant leap in step building experience!

So once the tread boards were laid, as per the side step, I then ripped down the boards to go on the riser (to the same size), measured up, cut the holes for the step lights, and then fixed it all in. 

Below is the finished job.

The finished job

At last we can now walk out the back door without having to jump over anything! 

I could even sit on the back step and have a well deserved cold one.

Looking good

Below shows the deck landing with it's final coat of finish applied, and it really looks the goods, and quite professional in my own humble opinion! Well the wife is impressed too, and that's all that matters in the end really! A satisfied customer.

Not a bad job for an IT guy with some patience and power tools.

Adding the polish makes it come up a treat

Below is the step lighting fitted in and operational. I am really pleased with the look, and it was well worth the extra effort and expense to find the right lights.

The in-step lighting was worth all the trouble of importing the lights

Next post we are going to finish off the decking boards on the main deck, so until next time, happy new year for 2016 and chat soon.

Wednesday, 9 September 2015

Deck Building. Building a flight of stairs

Now that I have become the stair master by building the two step wraparound stairs on the back landing, I now have to undertake the far longer set of stairs that run from the deck down to the lawn area. This is my first try at a full set of stairs so it's really all new to me. There's a really good instruction on stair building over at instructibles.com which was great for a newbie like me.

The first thing required is to figure out the rise and the run of the slope that the steps are to go down. The rise of a flight is the vertical distance between the floors or landings connected by the flight. The individual rise is the vertical measurement from top of tread to top of tread. The run is the horizontal distance covered by the entire staircase, or technically the distance from the trimmer face to the front of the first steps nosing. Using a long piece of straight timber clamped to the existing joists, and a plumb bob and tape measure, I obtained the rise and run.

With this data in hand I then headed over to the stair calculator web site and plugged the measurements into the X and Y fields. I then start playing around with the number of steps and the width of the stinger, until I am happy with the height of the step and depth of the tread, and I then have the measurements for the required stringers.

Using these dimensions and a large framing square with stair gauges, I draw out the stair pattern on the stringer just like the photo below.


Once you have the stringer marked out you can attack it with a combination of a circular saw to do the long cuts and a jigsaw the finish the corners. Be as accurate as possible with the first stringer as it will become the template for the rest of them to follow. In my case I need five stringers.

MEASURE TWICE, CUT ONCE is the old carpenters rule of thumb. Stick to it.


Before I can lay any kind of woodwork in I need to create a concrete pad for the bottom step to attach to. Per the photo below, once I had cut the first stringer cut I used that to help measure and position the form for the pad.

Measuring up for the form

With a pair of stringers cut, I positioned them on the outside and clamped them against the joists to hold them in place, then measured and levelled everything before mixing and pouring the concrete for the pad.

Checking and preparing for concrete

Once the concrete was cured and the form removed, I then clamped on four stringers just to make sure I hadn't missed anything! As you can see below, it all came out level.

Checking everything for level

The picture below shows all the stringers attached and in place, I bolted the stringers to the concrete pad using galvanised steel L brackets with Loxins to go into the concrete, and diagonally set coach bolts through the stringer into the bracket.

All stingers attached and bolted in place.

To attach the top of the stringers to the deck I used exactly the same method I utilised to attach the small two step stringers to the landing in my previous post, by boxing them in. Below shows all the stringer top steps locked in tight between the noggin and front ledger.


Top of stringers boxed in screwed down

So that was it! Per the photo below the entire deck frame was now finished (or so I thought at the time!) and ready for the council building inspector to give it the big tick!


Entire deck frame completed and ready for the council engineer's inspection

So I booked in the inspection and the engineer came over to have a look. He's actually quite a nice guy who is, after all, only looking after the safety of myself and my BBQ guests! There was a couple of things he wasn't happy with in the frame:
  1. The width of the open string on the landing steps he felt was a little too narrow and asked that they be in filled underneath to support the step (see my previous post on building the landing)
  2. The stringers were too long a run to go unsupported. Even though they were within code, he felt there was going to be too much flex in the steps and that I should underpin them in the middle with a bearer to support them.
  3. Owing to the length of the stinger, he wanted to see the top connection into the noggin reinforced with some builders strapping to support them.
They were all worthwhile observations that I happily agreed to rectify! I was at last getting some value out of a local council service! Building is so much easier to deal with than planning (you can catch up on my council planning nightmare post here).

So I got to work, and using the pick and post hole digger, started in on digging post holes for posts to support the new bearer. Below shows where they will go in.


And here I was thinking I was done digging bloody holes!

Because everything was already in place and I was loath to dissemble, I used a slightly different method of putting in the bearer. Normally I would concrete in the posts, let it set, then attach the bearer etc. 

In this instance I dropped the posts into the empty holes, passed through the bearer and bolted it onto the posts. I then clamped the whole assembly to the underside of the stringers where I had cut a notch to accept the top of the bearer. Once this was all in place I then poured the concrete into the holes.

Once the concrete was set I then just removed the clamps and screwed the stringers into the bearer. Job done!


Completed supporting bearer in place

Below is a closer view of the bearer notched into the bottom of the stringer and screwed in place.


Notched stringer screwed into the bearer

The whole assembly was now really, really, really solid as a rock. Not an ounce of bounce!


The post bone connects to the, bearer bone, the bearer bone connects to the, stringer bone

The last thing required was to add the builders strapping to the underside of the top of the stringer and up the back of the noggin that holds the stair assembly in place. 

Trust me it wasn't an easy exercise, as I wasn't prepared to disassemble everything to attach the strapping to the bottom of the stringer. Some judicious digging was required so I could get a hammer in at the right angle to knock in the galvanised clouts!


Stringers strapped in nice and tight!

So the stair frame was now completed to the satisfaction of the council, and myself. After sending off the photos of the extra work the council was happy to sign off the frame stage of the deck. Happy days!


The finished stair frame signed off!

Next up we get to into selecting and laying the decking boards!
If you want to jump ahead to finishing up the stairs you can have a look here.