Showing posts with label deck finishing. Show all posts

Thursday, 28 April 2016

Applying a Finish to the Deck

Now when it comes to applying the finish I had two options available to me:

  • number 1, get out there, clean the deck, apply a finish, or
  • number 2, get someone else to do it for me!
I chose the latter of course.

In the estate where I live we have our own community Facebook page, so I sent out the word for recommendations on a company who could assist in applying a finish to the deck, and a couple of people pointed me to a Melbourne based team called Decks Alive

What Decks Alive do is strip back any existing product on the deck, do a deep clean with an industrial cleaner, and then they apply two coats of Intergrain Ultradeck. It was going to work out at about $28 per sq. metre and would be done in a day, which is much easier than me getting out there and doing it!

Graeme from Decks Alive showed up as scheduled, the weather was great, and the whole thing was completed on the day.

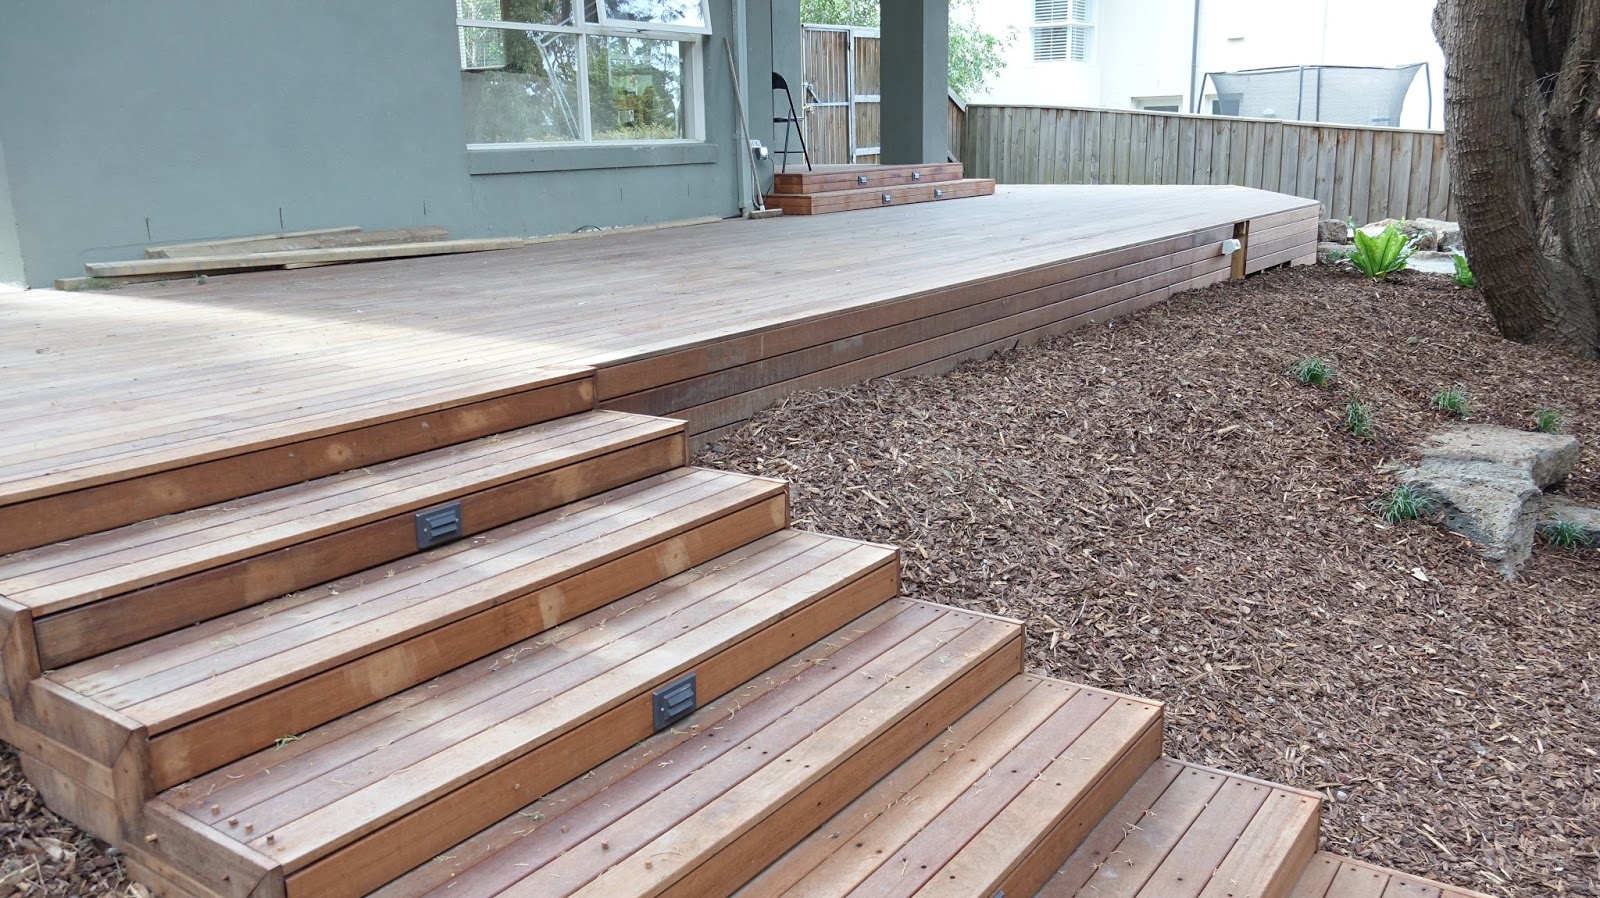
Below shows the landing and deck all nicely cleaned and polished with nair a bird poo in sight.

Deck and landing all looking spick and span

The framing on the top of the landing area and the lights look really great as you can see below.

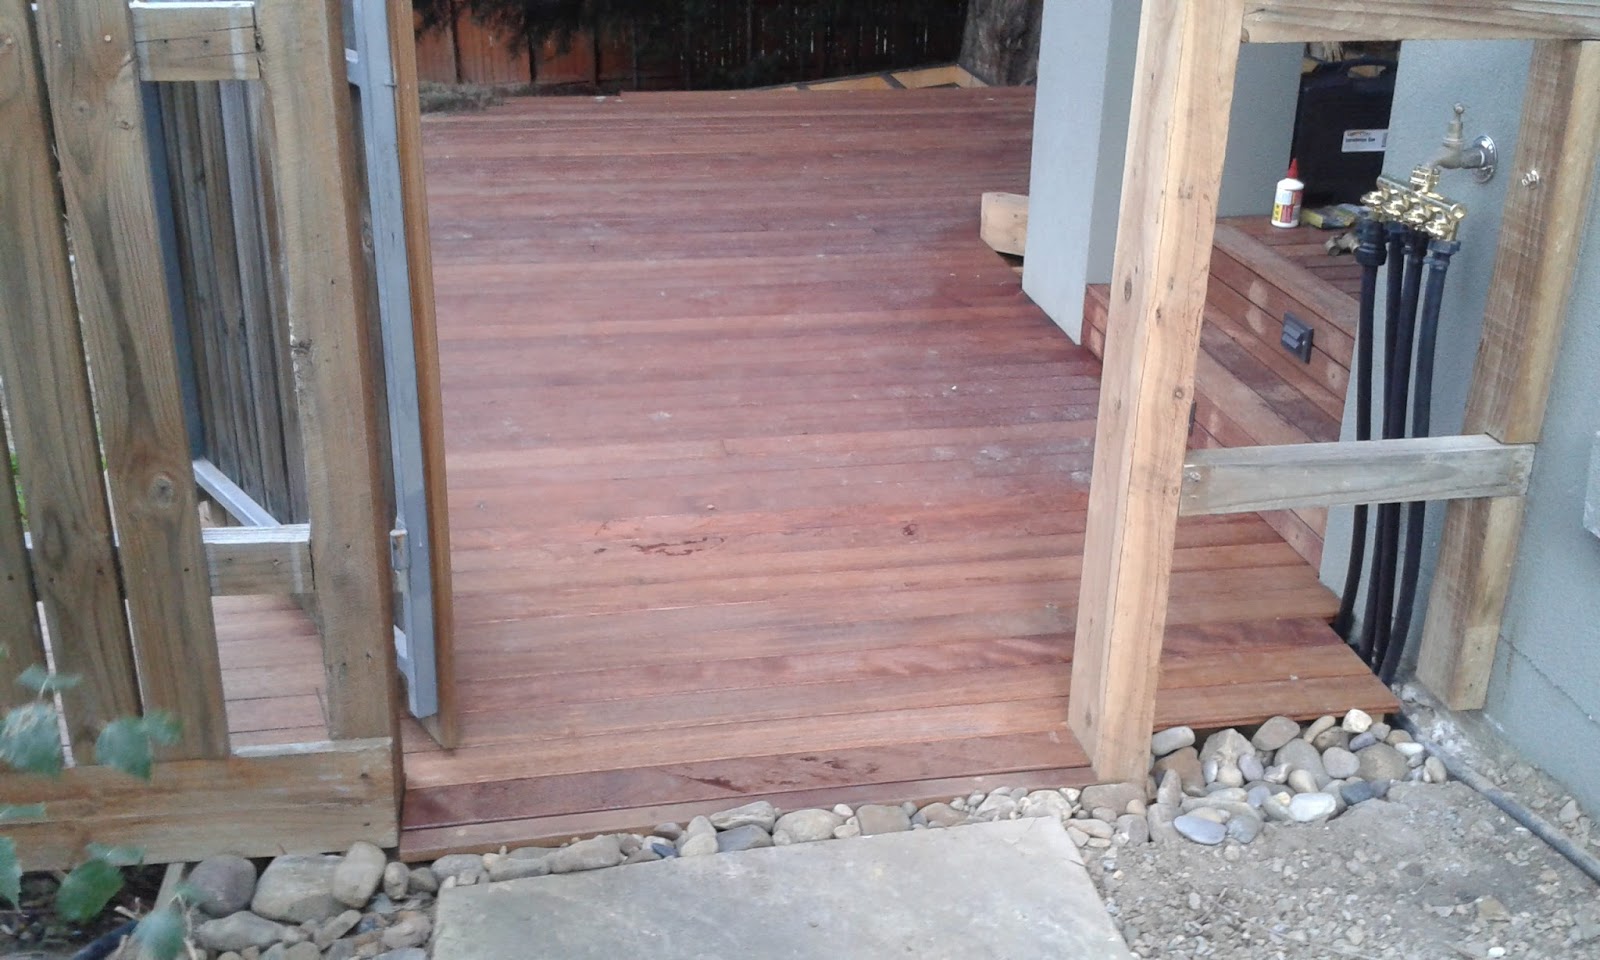
I guess if I could change anything I would have left a larger gap from the top of the door sill to the deck level. I built the landing boards to be level with the sill as you can see below, but in hind sight it would have been better to leave a gap so I could at least fit a door mat under the door! 

A lovely deep colour to the timber matches in with the stair light fittings

No it's not trick photography, the picture below is just a good perspective on the finish with the steps blending into the boards. Looks weird!

It looks like trick photography with the step disappearing into the deck 

The curve came out great with the juxtaposition I was looking for with the decking meeting up with the crazy-pave stonework. Edgy!

The contrast between the stone and wood is perfect

The stairs are a work of art! The effort it look to cut all those little bits and pieces to give the mosaic effect on the outside stair stringer has paid off in spades.

Steps and deck

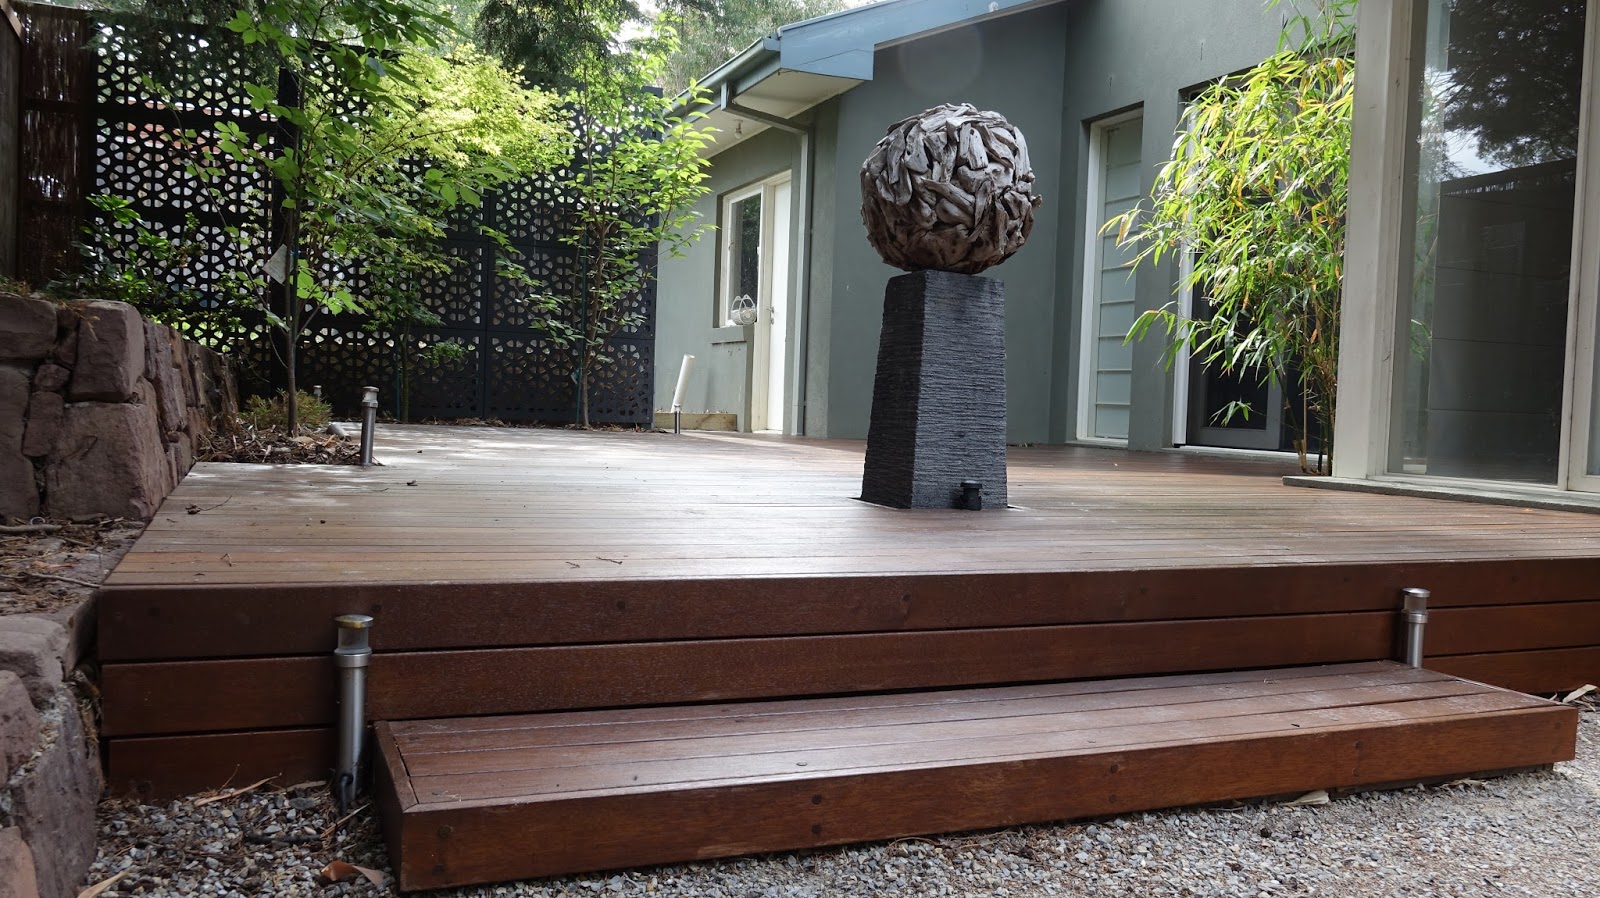
Below shows the completed deck and stairs. I was so impressed with the photo I made it the new cover for the blog! A few plants and it will be all done.

I was so impressed I made this my new blog cover photo!

Looking up the steps to the side of the house you can see the side deck.

Those stairs are looking good

The side deck that we completed the year previous was also in need of a new coat so we got both decks completed as part of the same deal. 100 sqm in total (1036 sqft) and it's come up a treat.

The side deck is two years old but looks as good as new

The garden beds have really taken off giving the side deck a very tropical feel.

Looking good

Looking down the side yard shows both decks together leading down to the lawn area at the bottom.

The view down the side yard to the bottom deck

Nice clean boards for the moment. I am sure the possums and birds will quickly change that! It's hard when there are so many trees large overhanging, which look beautiful, but you pay the price in maintenance.

Very tropical


Now I really need to do something about that kid's trampoline I can see over the neighbours fence. Hmmm....I wonder...

Neighbours be gone?

Tuesday, 16 February 2016

Deck Building. Finishing the Flight of Stairs

One of the most popular posts I ever put up was building the frame for the flight of stairs that runs from the decking down to the lawn area. Well now that the top decking has been completed, it's time to deck the stairs. We're getting close and the end is in now sight. The last piece of this grand puzzle to be completed is literally a puzzle!

As I've gone to so much effort to deck everything, I wasn't prepared to leave any of that treated pine from the stair stringers showing. Adding to the complexity however is the whole "nail free" concept. The Deck Master system wasn't going to be much use on the steps as the treads are only three boards across, and to top it off I had run out of the Deck Master slotted timber! 


So the plan I came up with was to use the wood plugs which I thought (at the time!) would be less fiddly. Rather than use the Deck-Max plugs though as I was going to need hundreds of these things, I decided to make my own to save some money! 

I sniffed around online and came up with a vendor in Sydney called "The Wood Works" that sells a plug cutter and counterbore set. This consists of two drill bits in the set; one for cutting the 10mm wood plugs, and the other to counterbore the 10mm holes that the wood plugs fit into. Sounds simple.

Image courtesy "The Wood Works"

To use the plug cutter you need a drill press (or a plunge router) to hold the cutting bit perfectly vertical so that the plug comes out straight. Be prepared for this as it's a bit of a chore! 

It's a 4 step process:

  1. Turn on the drill and place the timber
  2. Slowly drop the drill press to cut the plug and then raise it once the cut is finished
  3. Turn off the drill press
  4. Using a small screwdriver, knock out the plug from the centre of the drill bit
Go back to step 1, and repeat 850 times! I had plenty of scrap off-cuts to work with from which the plugs are cut. 

Eventually you'll end up with a bag full of wooden plugs, but it doesn't stop there. To make the 10mm plugs easier to fit into the 10mm holes, you have the chamfer them on one end with a sander. For this I taped up my fingers (or else the sander will eventually go through your fingernail as I found out) and loaded the sander in a vice. Phew, this is a lot of effort for a finish! Maybe it would have been easier to buy these, but where's the satisfaction in that?

Eventually I was ready to go. The plan was to start with the top edge of the outside stringers, then infill the treads and risers, and finally veneer the outside stringers to match and knit in with the horizontal boards on the front side of the deck. Just like a giant 3D jigsaw puzzle!

Below shows the beginning of setting the boards onto the top edge of the left hand stringer. They have to be lined up such that the boards on the risers and treads sit will sit flush when fitted, but also line up with the horizontal facing boards on the deck!

Bring on the mitre joins. Starting out with the first boards.

I'd first cut the board to fit, make sure everything lines up and is level, then glue the underside with "liquid nails" and clamp it in place. Next, using the 10mm counterbore tool I would drill the hole, then fix a decking screw into the hole, lastly when the piece is glued and screwed, I'd glue and bang in my pre-cut wood plugs. When it's all dried you then cut off the excess with a vibrating multi-tool and give it a sand to finish. No nails showing!

Below shows the progress down the left hand side which is about 3/4 complete.

Fair progress down the left hand side

Cut, fit, glue, clamp, drill, screw and plug, over and over. Eventually as shown below I reached the bottom of the left hand side. Like a jigsaw I found it very therapeutic and relaxing work!

Left had side completed

Once the left was completed, I moved across to the right hand side and finished it to match.

Right hand side completed

Now both sides were done I could start putting down the treads, and then finally and hopefully, walk down the stairs for the first time!

Looking at both sides

Once I had the outside edges of the two side stringers completed, I started on the top stair tread sizing up the boards and riser as you can see below. Measure twice, cut once!

Sizing up the boards for the first step

Below shows the first step and riser completed and fixed in place and I can finally stand on the top step! Note the notch I had to cut into the rise on the centre stringer.

First step boards fixed down

The notch on the nose of the centre stringer is to accommodate the step lighting. I'm using the same lights to match the landing steps, with four of them to fit, one on every 2nd step.

Cutting the centre stringer to allow for the step light

Fitting the lights was easier than on the landing, as here I only had to deal with a single board whereas on the landing I had to fit the light in between two boards. 

Essentially I just found the centre of the board, marked out the square where the light will fit, then cut it out with a drill and jigsaw.

Sizing up the boards with the step light fitted

So three steps down with the first light fitted and it's looking pretty good. The extra effort in making sure the stringers were spot on when I was building the frame has paid off as everything is dead level.

Top 3 steps done

Below shows fitting the riser board in to make sure the gaps are uniform. I had some thin timber offcuts that I used to wedge around the board, and then used a large flat blade screwdriver to level it all in place nice and square. Finally I then drill the holes for the screws and plugs.

Wedging up the riser board to make sure it's centred

So here is the completed stair with all the treads and riser boards in place. I left all the wiring tied and hanging just behind the holes so I can now fit the rest of the stair lights in.

Putting in the risers to finish up the bottom steps

Job done as you can see below, with all the lights fitted in. Now there's just a matter of plugging a few hundred holes!

Steps completed

With the steps and deck front now completed, I can start the jigsaw puzzle down the side of the steps. Starting at the top left of the stair I carefully measure and cut the timbers to fit around the top edge boards to give it a 'continuous' look. 

Then like any other piece it gets glued, clamped, screwed and plugged. Each piece of timber is a unique cut to suit that step, so there's no mass production here!

Commencing the jigsaw puzzle

Below is a closer look to how I cut, clamp and space each piece of timber to fit. Using the left over Deck-Max biscuits from building the side deck gives me a perfect 3mm gap. I then use the clamps to hold in place while I glued and screw. Once it's set I just prize out the biscuits with a pair of multi-grips, ready to use again on the next piece.


Next step

So here you can see I have finished the timber puzzle on the left side of the stairs all the way to the bottom. 

Left hand side done

It's a bit of effort to go through to cut and round off each piece of unique timber, but I think it looks so much nicer than bare treated pine. Below is the right hand side plugged and polished.

The right hand side puzzle completed

Below shows the deck step lights on and working. They really give it a nice professional finish, and they're also very practical on a dark night!

Light it up!

So here is the deck showing both sets of stairs completed (well almost completed, there's still the matter of plugging a couple of hundred holes).

Stairs completed

So that's it, job done, steps completed. I can tell you I've walked up and down them many times now, and they work as designed. There's not an ounce of bounce! Rock solid baby.

Worth the effort

So now the deck construction is completed! Time for a well earned beer. 

Next post we'll look at landscaping around the deck to incorporate it into the rest of the yard, as well as cleaning and applying a finish.

Thursday, 28 January 2016

Decking to the other side and beyond!

Since I starting to lay the boards on the deck I've now completed the landing, completed the steps on the landing, and laid the boards around the curve. Now it's time to bring it all together and take the boards all the way across to the other side and beyond.

First up is to complete the decking all the way around the right hand side (when looking at the original plan) to meet up with the side gate. There was a complication with the side fence however. Whatever the fencing contractor had used to "concrete" in one of the posts wasn't like any concrete I had ever seen. It had set like black glass, leaching into the wood and destroying the bottom of the post. The timber literally turned into dust.

To fix it I had to disassemble the fence, dig out the old post and that "black stuff", and then replace it with a nice new post fixed in with conventional old concrete mix, and then rebuild the fence.

Once that was fixed I finished the deck up to the gate as you can see below.

Finished the decking to the gate

Now that the right hand side was finished I just trimmed off the end of the deck with a straight edge and circular saw, giving a lovely finished look. There was very little excess to cut off as the Deck Master system lets you pick and choose which timbers you use which minimises waste.

Below is the finished right side of the deck.

Right side of the deck completed and trimmed

With the right edge finished I continued to lay the boards all the way across until I came to the last board for the top of the deck!

Of course the edge of the last board didn't line up perfectly with the end of the joists! I challenge anyone can be that accurate in their planning. All I did was leave some excess joist hanging out which I then cut flush with the edge of the last board using a reciprocating saw. I then cut some front facing joists that connected in on a 90 degree angle to the top joists which will be used later to fix front facing boards to.

To start the last board I began on the left side of the deck near the steps which introduced their own set of complications! 


As you can see below I had to put a slight kink in the board to get around the top step because it juts out about an inch from the deck. Nothing some judiciously and carefully cut mitre joins can't fix!

Fitting around the top of the stairs

Below is the crowning glory of fitting the very last board to the top of the deck. Now if you remember, the Deck Master timber comes pre grooved, and because I didn't want the grooved edge showing I had to use a standard 90x20 mm decking board. Using a standard board requires slots to be cut along one side of the board using a biscuit cutter, to match up with the Deck Master claws on the inside board, essentially replicating how the grooved timber works. 

To fix the outside of the board I used the Deck-Max screws and plugs as I did with the landing steps.

Two connection methods! Claws on the inside and plugs outside

Below shows the last board fixed down! You can also see all the vertical joists that I now have to fix the facing boards onto. This will close up the underneath of the deck.

The last board done!

Below shows all the facing boards fitted, the fixing down the last board! You can see I've left a spot for a small access hatch which I'll knock up later, and this is also where I am putting an all-weather electrical outlet so I won't need to run cords across the deck if I need electricity on the far side.

Fitting the last facing board

The photo below shows the same but from the other end before I "release the clamps!". It's a big milestone to fit the very last board!

So close now

So here it is below with all the top and facing boards completed. You can see the trail I have worn into the ground walking backward and forward along the front of the deck! Nothing a bit of landscaping mulch can't hide I'm sure.

Front facing boards completed

So the deck top,side and landing steps are done and it really has come up a treat. Exactly as I hoped all those months ago when this kicked off. I guess I'll have to do something about the neighbour's trampoline now!?

Top deck completed

All that is left to do now is to lay the boards onto the steps which lead down to the grassed area, and then the job is pretty much finished. More on that next post. Enjoy.

Thursday, 14 January 2016

Finishing up the Landing Steps

Happy New Year 2016 everyone!

I've been having a bit of a break enjoying the Australian Christmas summer time out on the back deck (asleep on the lounge some of the time too). 


Last post we laid the decking around the curved stonework, so now let's get back into it and look at finishing up of the landing steps by putting the boards down!

I decided to start simple and tackle the side steps first. Below you can see I start by fixing the nose board first, using the riser boards clamped underneath to make sure it all lines up. I then fixed the nose board down using the DeckMax counter-bore tool with screws and wood plugs.

The boards for the risers were a little trickier as I had to:

  1. rip them down to size, allowing for a 3 mm gap above and below each board. You can see below I used slivers of offcuts to space the boards to 3 mm; and then
  2. cut a hole in the middle for step lighting I wanted to fit (see the next picture below)

Fitting the nose board

The step light shown below is what I want to fit into the riser boards for all the steps. It took me a while to find exactly what I was looking for, and eventually had to import them from Hinkley Lighting in the USA via Amazon, as I couldn't find anything locally that was similar. They have a really comprehensive array of deck lighting available. 

They were pretty easy to fit, I just measured up the back of them and marked up the boards with the outline, then cut each board using the jigsaw.

Hinkley Lighting 1546BZ horizontal deck light (image courtesy of Amazon)

For the tread boards I had to cut in notches to the final board to fit around the stringers. I just measured them up, transposed them onto the board with a pencil, and then made the required cuts into the board with a jigsaw. Below you can see the bottom step completed with the light fitted in.

Bottom step completed with step light fitted

It's then just a case of replicating the process for the next set of boards for the facing riser and fitting it all together. Below is the completed side step with the lights in and turned on!

Side steps completed with operational stair lights

Having satisfied myself that it worked, I then moved on to the front step using the same methodology. In this instance though just to complicate things a little, there were mitre joins needed on each corner. 

I pre-cut all the boards before hand and clamped everything in place first just to make sure it was all going to fit. You'll notice I still use the Deck-Max "original" biscuits as spacers on the tread boards, as they are really great for getting the gap to exactly 3 mm, and I still have 1/2 a box left over from doing the side deck!

With the mitre joins I measured and cut the boards slightly over sized, and then using the circular saw proceeded to cut the smallest 1 mm or so "nibble" of the end, and tried it for size. If it didn't fit I'd take another mm off, and try again, and then again, until it was an exact fit. 

It's real easy to cut the wood shorter slowly, but it's damned hard to try and add it back on if you cut it too short, so take your time! 

You can see below I have already fixed the nose board, and have clamped up the next ones for size and spacing.


Checking the boards for size and spacing

Below shows the tread boards fitted and fixed. Like with the side step, I had to cut notches into the last board to fit around the stair stringers.

Step tread boards completed

As you can see below, it's worth taking the time on those mitre joins to get them spot on. The joins are all under cover, so I didn't have to worry too much about leaving a gap on the mitre. If this join was exposed to the weather you'd want to leave a mm or two gap on the mitre join to allow for any swelling of the wood that could occur.

Nice and precise joins make it a professional looking job

Below shows the finished step tread boards from the opposite angle. Once the glue on the wood plugs has dried you just cut them off with a vibrating multi-tool and sand them smooth.

Once small step for me, and giant leap in step building experience!

So once the tread boards were laid, as per the side step, I then ripped down the boards to go on the riser (to the same size), measured up, cut the holes for the step lights, and then fixed it all in. 

Below is the finished job.

The finished job

At last we can now walk out the back door without having to jump over anything! 

I could even sit on the back step and have a well deserved cold one.

Looking good

Below shows the deck landing with it's final coat of finish applied, and it really looks the goods, and quite professional in my own humble opinion! Well the wife is impressed too, and that's all that matters in the end really! A satisfied customer.

Not a bad job for an IT guy with some patience and power tools.

Adding the polish makes it come up a treat

Below is the step lighting fitted in and operational. I am really pleased with the look, and it was well worth the extra effort and expense to find the right lights.

The in-step lighting was worth all the trouble of importing the lights

Next post we are going to finish off the decking boards on the main deck, so until next time, happy new year for 2016 and chat soon.